
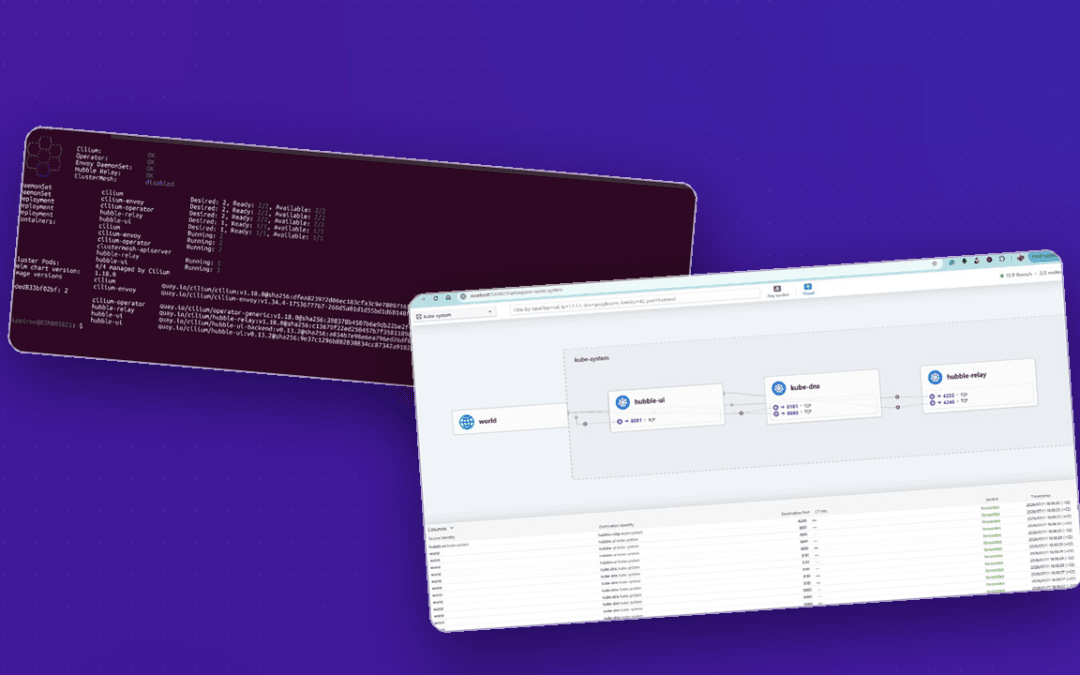
Talos Linux is a minimal, immutable, API-driven operating system built specifically for Kubernetes — no SSH, no shell, no package manager. That design is great for security and reliability, but it also means installing a CNI like Cilium works a little differently than on a regular Ubuntu node. In this guide we show you exactly how to install Cilium on a Kubernetes cluster running Talos Linux, including the Talos-specific machine-config changes and Helm values — with real output from a cluster we built while writing this article.
By the end you will have Cilium running as your CNI, kube-proxy fully replaced by Cilium’s eBPF data path, and Hubble giving you live network observability.
What is Cilium, and why run it on Talos?
Cilium is a CNI (Container Network Interface) built on eBPF, the Linux kernel technology that lets you run sandboxed programs directly in the kernel. Instead of relying on iptables and kube-proxy for service routing, Cilium handles networking, load balancing and network policy in eBPF — which is faster, scales better, and unlocks deep observability through Hubble.
Talos ships with Flannel as its default CNI. Flannel is fine for basic networking, but production clusters usually want more: network policy enforcement, transparent encryption, BGP, and the observability that Cilium + Hubble provide. Because Talos is a locked-down, immutable operating system, you configure all of this declaratively — there is no node to log into and tweak by hand, and even the CNI is chosen by name rather than installed manually. Everything about the system is driven through the Talos API.
Prerequisites
talosctl,kubectland Helm 3 installed- The Cilium CLI (optional, but great for verification and Hubble)
- A Talos cluster you are about to bootstrap (VMs, bare metal, or a local Docker cluster for testing)
- Cilium 1.16+ (this guide uses 1.18)
Step 1 — Disable the default CNI and kube-proxy
This is the key Talos-specific step. Before you bootstrap the cluster, you tell Talos not to install Flannel and not to run kube-proxy — because Cilium will provide both. You do this with a small machine-config patch:
# patch.yaml
cluster:
  network:
    cni:
      name: none        # do not install the default Flannel CNI
  proxy:
    disabled: true      # Cilium replaces kube-proxy using eBPF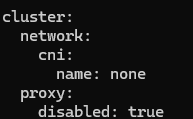
cni.name: none and proxy.disabled: true before bootstrap.Step 2 — Bootstrap the cluster (NotReady is expected)
Apply the patch when you create the cluster. For a real cluster you would generate the config with the patch and bootstrap the nodes; for local testing you can spin up a Docker-based cluster in one command:
# Local test cluster (Docker) — great for trying this out
talosctl cluster create docker --config-patch @patch.yaml

# Real cluster (VMs / bare metal)
talosctl gen config my-cluster https://<CONTROLPLANE-IP>:6443 --config-patch @patch.yaml
talosctl apply-config --insecure -n <NODE-IP> --file controlplane.yaml
talosctl bootstrap -n <CONTROLPLANE-IP>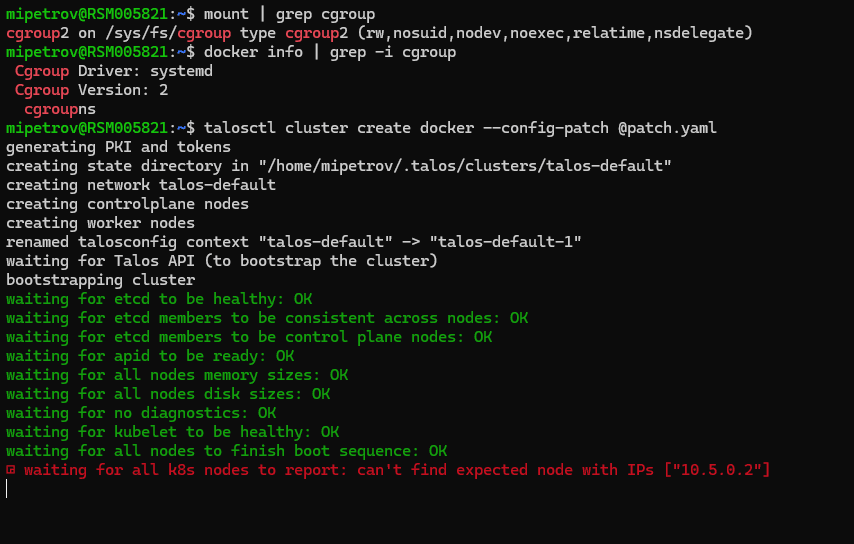
Now fetch the kubeconfig and look at your nodes:
talosctl -n <CONTROLPLANE-IP> kubeconfig .
export KUBECONFIG=$PWD/kubeconfig
kubectl get nodes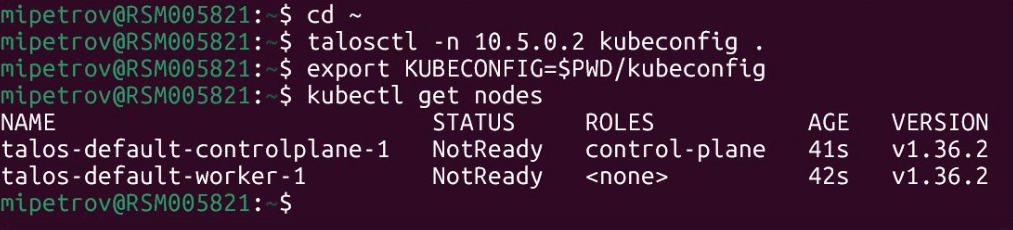
Tip: with cni: none, talosctl cluster create docker will pause on “waiting for nodes to be ready”. That is expected — fetch the kubeconfig from a second terminal and continue with the Cilium install; the node goes Ready as soon as Cilium is up.
Step 3 — Install Cilium with Helm
Add the Helm repository and install Cilium — the release name is cilium — into the kube-system namespace with the Talos-specific values:
helm repo add cilium https://helm.cilium.io/
helm repo update

helm install cilium cilium/cilium --version 1.18.0 \
  --namespace kube-system \
  --set ipam.mode=kubernetes \
  --set kubeProxyReplacement=true \
  --set k8sServiceHost=<CONTROLPLANE-IP> \
  --set k8sServicePort=6443 \
  --set cgroup.autoMount.enabled=false \
  --set cgroup.hostRoot=/sys/fs/cgroup \
  --set securityContext.capabilities.ciliumAgent="{CHOWN,KILL,NET_ADMIN,NET_RAW,IPC_LOCK,SYS_ADMIN,SYS_RESOURCE,DAC_OVERRIDE,FOWNER,SETGID,SETUID}" \
  --set securityContext.capabilities.cleanCiliumState="{NET_ADMIN,SYS_ADMIN,SYS_RESOURCE}" \
  --set hubble.enabled=true \
  --set hubble.relay.enabled=true \
  --set hubble.ui.enabled=true
Local Docker cluster? Use Talos KubePrism instead of the API IP: set --set k8sServiceHost=localhost --set k8sServicePort=7445. Everything else stays the same.
Understanding the Talos-specific values
- kubeProxyReplacement=true — Cilium handles all service routing in eBPF, since we disabled that component in Talos.
- k8sServiceHost / k8sServicePort — with no kube-proxy, Cilium needs to reach the API server directly. Use the control-plane IP/VIP and
6443(orlocalhost:7445on Docker). - cgroup.autoMount.enabled=false + cgroup.hostRoot=/sys/fs/cgroup — Talos already mounts cgroup v2; we tell Cilium not to remount it.
- securityContext.capabilities.* — Talos is locked down, so Cilium needs these Linux capabilities declared explicitly.
- ipam.mode=kubernetes — allocate pod IPs from the PodCIDR that Kubernetes assigns to each node.
Step 4 — Verify the installation
Give the Cilium pods a minute to pull their images and start, then check the status:
cilium status --wait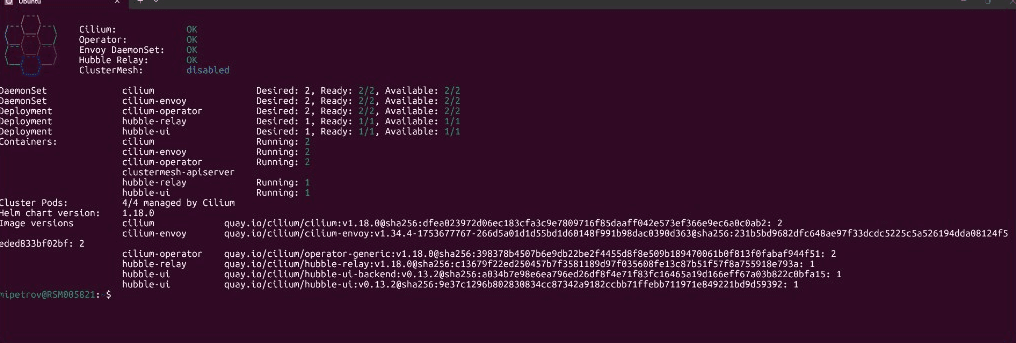
The moment Cilium is running, the CNI is in place and the nodes flip to Ready:

Finally, confirm that Cilium really did replace kube-proxy:
kubectl -n kube-system exec ds/cilium -- cilium-dbg status | grep -i kubeproxy
KubeProxyReplacement: True — service routing is now handled entirely by Cilium’s eBPF data path.Step 5 — Enable Hubble observability
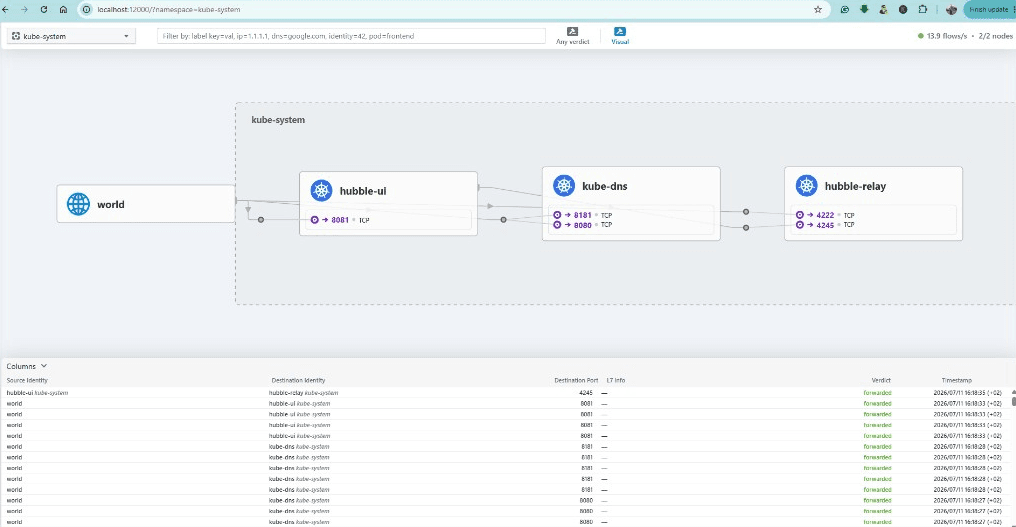
We enabled Hubble during the install, so the UI is ready to go. Open it with:
cilium hubble uiPick a namespace (for example kube-system) and Hubble draws a live service map of who is talking to whom, with per-flow verdicts — one of the biggest reasons teams choose Cilium in the first place.
Common mistakes to avoid
- Forgetting
cni: none— if Talos installs Flannel first, you end up with two CNIs fighting. Set it before bootstrap. - Wrong
k8sServiceHost— with kube-proxy disabled, a wrong API address means Cilium never connects and pods stay pending. - Leaving kube-proxy enabled while setting
kubeProxyReplacement=true— pick one; on Talos, disable kube-proxy and let Cilium own it. - Skipping the cgroup values — without
cgroup.autoMount.enabled=falseCilium may try to remount cgroups that Talos already manages. - Panicking at NotReady nodes — that state is expected until the CNI is installed.
Running Cilium on Talos in production
A local cluster is perfect for learning, but a production setup adds more: a highly-available control plane with a VIP, network policies, transparent encryption, Hubble metrics wired into Prometheus and Grafana, and a safe upgrade path for both the operating system and Cilium. Because Talos treats the whole system as immutable, those upgrades are far more predictable than patching a traditional OS by name-and-version. We run exactly this kind of stack for our own workloads. If you would like a hand designing or operating a Talos + Cilium cluster, take a look at our DevOps consulting and support — and if you are new to the wider picture, our guide on what a DevOps pipeline is puts CNIs like Cilium in context.
Frequently asked questions
Does Talos Linux support Cilium?
cni.name: none) in the machine configuration before bootstrap, then install Cilium with Helm using a few Talos-specific values (cgroup and securityContext settings, and the API server address for kube-proxy replacement).Do I need to disable kube-proxy to use Cilium on Talos?
proxy.disabled: true in the Talos config and kubeProxyReplacement=true in Cilium lets Cilium handle all service routing in eBPF, which is faster and removes iptables overhead. If you prefer, you can keep kube-proxy and set kubeProxyReplacement=false.Why are my Talos nodes NotReady after bootstrap?
cni.name: none, the kubelet cannot mark nodes Ready until a network plugin is installed. As soon as Cilium is running, the nodes turn Ready automatically. This is expected behaviour, not an error.What is the difference between installing Cilium on Talos and on Ubuntu?
Is Cilium free to use?
Conclusion
Installing Cilium on a Talos Linux Kubernetes cluster comes down to two Talos-specific things: disable Flannel and kube-proxy in the machine config, then install Cilium with the right Helm values. Everything after that — cilium status, kube-proxy replacement, Hubble — is standard Cilium. The payoff is an eBPF-powered network with better performance, network policy and real observability, all managed declaratively the way Talos intends. If you want help taking this from a test cluster to production, get in touch for a free consultation.
Once Cilium is running, the next step on the same cluster is to replace Ingress NGINX with the Cilium Gateway API on Talos.
We run this exact stack — Talos, Cilium, kube-proxy replacement — in production, not just in a lab, and the biggest operational lesson is to treat the machine config as your single source of truth. Because Talos is immutable, the instinct to “SSH in and fix it” is gone; that feels limiting for a day, then you realize it’s exactly why the clusters are reproducible. If we had to flag one thing: enable kube-proxy replacement from day one rather than retrofitting it, and bring up Hubble early — the eBPF data path is fast, but the observability you get for free is what actually saves you at 3 a.m.
— Milan Petrović, Senior Cloud/DevOps Engineer · CKA, RHCE, RHCSA